
Table of Contents
- Why Build Your Own Greenhouse: Benefits and Advantages
- Planning Your DIY Greenhouse Project
- Choosing the Right Location for Your Greenhouse
- Selecting Materials for Your Greenhouse Construction
- Building a DIY Greenhouse: Step-by-Step Guide
- Essential Features to Include in Your Greenhouse Design
- Outfitting Your Greenhouse: Tools and Equipment
- Maintaining Your DIY Greenhouse Year-Round
- Cost-Effective Tips for Building Your Garden Oasis
- FAQ
- What are the main benefits of building a DIY greenhouse?
- How do I choose the right location for my greenhouse?
- What materials should I use for greenhouse construction?
- Can you provide a step-by-step guide for building a DIY greenhouse?
- What essential features should I include in my greenhouse design?
- What tools and equipment are necessary for outfitting a greenhouse?
- How can I maintain my DIY greenhouse year-round?
- Do you have any cost-effective tips for building a greenhouse on a budget?
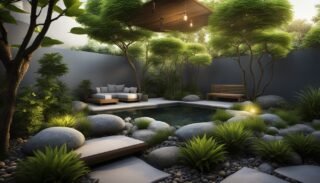
Ever dreamed of having fresh tomatoes in winter or tropical flowers blooming year-round? A homemade greenhouse can make that dream come true. I’ve found that making my own garden paradise is not just a fun project. It’s a game-changer for my green thumb ambitions.
Building a DIY greenhouse opened up a world of possibilities for year-round growing. It lets me extend my gardening season and protect delicate plants from harsh weather. My little glass haven has become the heart of my backyard. In this guide, I’ll show you how to create your own garden oasis. We’ll cover planning, construction, and maintenance tips to keep your greenhouse thriving all year.
Key Takeaways
- A homemade greenhouse extends your growing season
- DIY greenhouses offer protection from pests and weather
- Proper planning is crucial for a successful greenhouse project
- Choosing the right location impacts your greenhouse’s efficiency
- Regular maintenance ensures year-round plant growth
Why Build Your Own Greenhouse: Benefits and Advantages
Building my own greenhouse has changed my gardening for the better. It’s full of benefits that make it a great choice for garden lovers. Here are some of the perks I’ve seen since making my garden a greenhouse oasis.
Extending Your Growing Season
One big plus is the longer growing season. With my greenhouse, I can start planting early in spring and keep going into fall. This means I have fresh veggies and lovely flowers for longer. The controlled environment lets me set the perfect temperature for plants, no matter the outside weather.
Protection from Pests and Weather
Keeping pests away has been a big win for my garden. My greenhouse keeps insects, rabbits, and other pests from eating my plants. It also protects against bad weather like heavy rain, strong winds, and hail. This has greatly improved my harvest and plant quality.
Creating a Perfect Environment for Exotic Plants
Now, I love growing exotic plants. My greenhouse is the ideal spot for these plants that wouldn’t make it here. I can control the humidity, temperature, and light to match their natural homes. This has opened up new gardening adventures for me.
Planning Your DIY Greenhouse Project

Planning is crucial for a successful DIY greenhouse. Before starting, I sketch out my design. This step helps me see the final product and avoid mistakes.
First, I think about the size of my greenhouse. It’s easy to want a big one, but I consider my space and how much I can maintain. Starting small can always grow later.
Then, I decide on the style. Do I want it attached to my house or standing alone? Each style has its own benefits and drawbacks, affecting how it looks and works.
Setting a budget is important in my planning. I make a list of everything I need and check prices. This way, I can make a realistic budget and find ways to save without cutting corners.
- Determine greenhouse size
- Choose a style that fits your needs
- Create a detailed materials list
- Set a realistic budget
Putting effort into planning ensures my greenhouse meets my gardening goals and budget. This preparation makes building easier and ensures I’ll enjoy my greenhouse for years.
Choosing the Right Location for Your Greenhouse
Finding the perfect spot for your greenhouse is key to its success. I’ll help you with the main things to think about when picking a spot.
Sun Exposure
Getting enough sunlight is crucial for plants to grow well. I suggest picking a spot that faces south and gets at least 6 hours of direct sunlight each day. This makes sure your plants get the energy they need all year.
Drainage and Soil Conditions
It’s important to have good drainage to avoid water pooling around your greenhouse. Look for a spot that’s a bit higher or use gravel or raised beds to help with drainage. Make sure to test the soil’s pH and type to make sure it’s right for your plants.
Utility Access
Having easy access to water and electricity makes taking care of your greenhouse easier. I recommend putting your greenhouse close to where these utilities are or planning for extensions. This lets you use efficient watering systems and climate control devices easily.
When picking a spot for your greenhouse, remember to consider these things:
- Protection from strong winds
- Being close to your home for convenience
- Local rules and regulations
- Room for growth in the future
Thinking about these points will help you find the perfect spot for your plants. The right spot is the base for a successful greenhouse that brings happiness and lots of harvests for years.
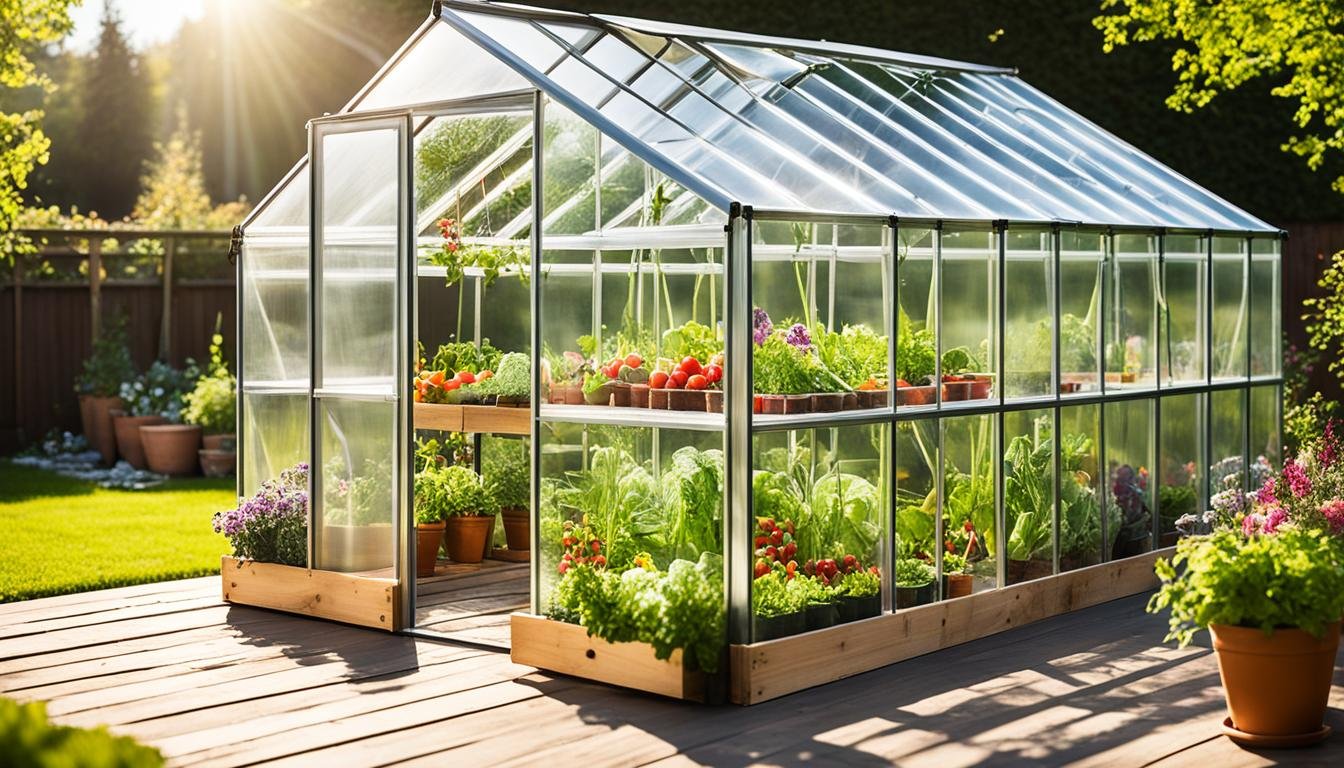
Selecting Materials for Your Greenhouse Construction
Choosing the right materials for your greenhouse is key to a thriving garden. The best options are those that are durable, affordable, and insulate well. Let’s look at some top choices for framing and covering your DIY greenhouse.

Wood is a classic choice for framing. It looks great, insulates well, and is easy on the wallet. However, it does need regular upkeep. Aluminum framing is another great option. It’s light, doesn’t rust, and lasts a long time. It costs more than wood but is easier to maintain.
PVC framing is the cheapest option but isn’t as strong as wood or aluminum. It’s still a good choice for those on a tight budget.
For covering your greenhouse, glass lets in lots of light and lasts a long time. It’s heavy and pricey but looks amazing. Polycarbonate panels are a great alternative. They’re light, won’t break easily, and keep your greenhouse warm.
Plastic sheeting is the cheapest way to cover your greenhouse. But, you’ll need to replace it often.
- Wood: Affordable, good insulation, requires maintenance
- Aluminum: Lightweight, durable, higher cost
- Polycarbonate: Shatter-resistant, good insulation, versatile
- Glass: Excellent light transmission, heavy, expensive
Think about your climate, budget, and gardening goals when picking materials. A mix of aluminum framing and polycarbonate panels works well for most DIY greenhouses. They offer great durability, insulation, and value.
Building a DIY Greenhouse: Step-by-Step Guide
Are you ready to start building your own greenhouse? This DIY guide will walk you through each step to create your dream garden oasis.
Preparing the Foundation
First, I level the ground and lay a solid base. I use concrete blocks or a wood frame filled with gravel. This ensures proper drainage and stability for my greenhouse.
Constructing the Frame
Next, I build the frame. I choose between wood or PVC pipes, ensuring each piece fits perfectly and is securely attached. A strong and stable frame is key for my greenhouse.
Installing the Covering Material
Now, it’s time for the fun part! I attach the covering material, like plastic sheeting or polycarbonate panels. Starting from the bottom, I work my way up, ensuring everything is tight and secure against wind and weather.
Setting Up Ventilation Systems
Finally, I focus on ventilation installation. It’s vital for controlling temperature and air flow. I add vents near the roof and maybe some fans. Proper ventilation keeps my plants healthy and prevents overheating.
With these steps, I’ve built a fully functional greenhouse. Seeing my DIY project come to life is rewarding. It’s now ready for growing veggies and flowers all year!
Essential Features to Include in Your Greenhouse Design

Incorporating key features into your greenhouse design can greatly improve your garden oasis. Let’s look at some important elements for your DIY greenhouse.
Climate control is a top feature you should consider. It’s smart to add proper ventilation to manage temperature and humidity. Options include roof vents, side vents, or automatic vent openers. For colder areas, a heating system keeps plants warm all year.
Managing water is key for healthy plants. Drip irrigation systems work well by watering plants directly at their roots. This cuts down on waste and prevents diseases. Also, having a water storage tank for rainwater is smart. It’s good for the planet and saves money!
Storage solutions are often overlooked but are vital. I suggest adding:
- Wall-mounted shelves for small tools
- A potting bench for seedling prep
- Hooks for hanging larger equipment
These storage options help keep your greenhouse tidy and make the most of your space. With these essential features, your plants will flourish in a well-organized environment.
Outfitting Your Greenhouse: Tools and Equipment
Having the right tools makes a big difference in your greenhouse. Let’s look at the key items you need for your garden oasis.
Shelving and Work Benches
Plant shelving is key for saving space and keeping your plants tidy. I suggest using metal or wooden shelves that can hold heavy pots. A workbench is great for tasks like potting and transplanting.

Watering Systems
Good irrigation systems change the game for greenhouses. I prefer drip irrigation or soaker hoses for steady moisture. For smaller spaces, a watering can or hose with a spray nozzle is enough.
Temperature Control Devices
Climate control tools are vital for perfect growing conditions. I use thermometers, humidity gauges, and vent openers to manage temperature and airflow. A small heater is also useful for colder areas to extend the growing season.
- Thermometers and hygrometers
- Vent openers
- Fans for air circulation
- Shade cloth for hot days
Quality greenhouse equipment helps your plants flourish all year. Begin with the basics and add more tools as you learn more about gardening.
Maintaining Your DIY Greenhouse Year-Round
Keeping your plants healthy is key in a DIY greenhouse. Regular care keeps growing conditions perfect and stops problems early. Let’s look at important care tips for your greenhouse all year.
Seasonal care is a must to adapt to weather changes. In spring, I clean the greenhouse and sterilize surfaces. Summer means more ventilation and shading to avoid heat.
Fall is great for fixing things and getting ready for winter. Winter needs careful temperature watching.
Managing pests is also crucial. I check plants for pests and use natural ways to fight them. Ladybugs are great for controlling bad bugs.
To keep plants healthy, I do these things:
- Check and adjust humidity and ventilation
- Prune dead or sick plants right away
- Rotate crops to avoid soil problems and diseases
- Clean and disinfect tools often to stop infections
By doing these tasks, my DIY greenhouse stays a lush garden all year. Remember, regular care means more harvests and happy, healthy plants.
Cost-Effective Tips for Building Your Garden Oasis
Creating a budget-friendly greenhouse doesn’t mean you have to give up quality. Using repurposed materials can cut costs and add charm to your garden. For example, old windows, doors, and shower doors work great as panels. I even turned an old bookshelf into shelves for my plants!
Choosing energy-efficient designs helps save money over time. I picked double-walled polycarbonate panels instead of glass. They’re lighter, cheaper, and keep the temperature steady. For air flow, I used manual roof vents instead of expensive automatic ones. These choices have saved me a lot of money.
DIY projects can be cheaper than buying new equipment. I made my own raised beds with reclaimed wood, saving a lot of money. For watering, I set up a rainwater collection system with gutters and a barrel. These simple changes have led to big savings in my home greenhouse.
To get the most out of my investment, I grow valuable crops like tomatoes and herbs all year. This approach makes my budget-friendly greenhouse pay for itself with fresh produce. With these smart tips, I’ve built a beautiful garden oasis without spending a lot of money.